How to make Animated GIFs Using Photoshop CS3
Jul 02, 2012, by admin
 The animated GIF allows a designer to insert movement into webpage graphics to draw the attention of the spectator. There are many software programs available that allow the creation of these graphics, one of which is Adobe Photoshop Creative Suite 3 (CS3). It is important to note that this tutorial needs basic knowledge of Photoshop CS3, along with experience using layers.
 Easy steps
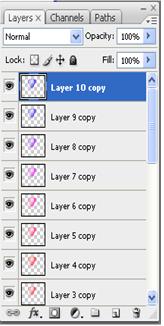
1.Create a document with each frame of the animation on a different layer.
2.Select the layers to be used in the animation from the layers palette.
Note: To select a group of layers, select the layer at the top of the group. Then hold the shift key and click on the bottom layer. This will highlight every layer in between.
3.Open the animation palette by choosing “Window” from the menu bar and selecting “Animation.“ When the animation palette opens, it should look like the photo below. If it doesn’t, that means it opened in the timeline view.
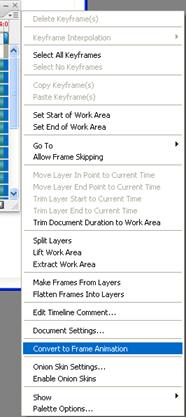
4.Change the frame animation view. Click on the “Flyout” menu in the upper right hand corner of the animation palette and select “Convert to Frame Animation.”
 5.Change every layer showing on one frame to every layer showing on its own frame. Click the “Flyout” menu on the animation palette and choose “Make frames from layers.”
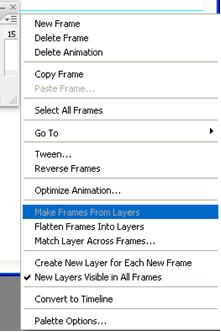 Note: All layers don’t have to be selected. To select a few layers, use the copy layer button at the bottom right of the animation palette to add layers.
6.Modify each frame. Select the frame on the animation window and change it as desired in the main Photoshop window.
 Note: To add or remove a graphic from another layer to any frame, select the frame and in the layers palette, click the “eye” to toggle on or off the visibility for that layer.
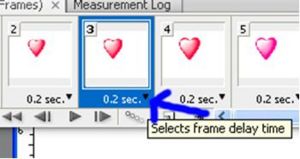
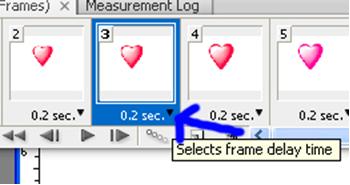
7.Click on the arrow head under each frame to display the timing menu. Select the display time for each frame.
 8.From the file menu, select export to export the document as a movie. Alternatively, you could go to the “Save” option and save the file as a GIF. Be sure to select “Save for Web and Devices” (.gif under this option).
Note: If you want to loop your animation continuously, you can select that option in the window that pops up after you have chosen “Save For Web and Devices”. Under the color table that shows up is “Looping options.”Select “forever” and save it. You can also pick “others” and select the amount of times you want your animation to loop.


